Wednesday 29 November 2023

Rotation

After finally getting the SDRAM working (turned out to be a PLL/clock issue) I started to look at screen rotation, given that Namco Classics runs with the monitor in vertical orientation.

There are components in the framework which rotate the video for you, so you don't need to worry about doing it all within the core like I did for all my projects back in the PACE days. It uses the on-board DDR3 as a frame buffer and as a bonus the components that you need to do it also include scan doubler effects such as CRT scan line emulation.

It took quite a while to wrap my head around how it all holds together, modify the design to accommodate the new functionality - which included adding a few more signals out of the YGV608 core - and removing unused signals and code from the project. But eventually I saw this...

Correctly oriented display on HDMI output from MiSTer

It's by no means perfect, and the scan doubler effects don't look right, but I know my video clock is twice what it should be (producing a screen twice as wide as it should be) and there are a few aspects of the MiSTer video framework I'm still unsure of.

Regardless, at least the components are all there so it's just a matter of fixing a few minor issues and I'll have a nice rotated screen to continue with.

Tuesday 28 November 2023

Color (sic) Palette DAC

No luck with the SDRAM at this point - not even seeing what I expect in SignalTap on the ROM download - so I thought I'd change tack for a while and work on the Color Palette DAC block.

The YGV608 Application Manual expands on the top-level block diagram in a few of the sections, and the Color Palette DAC is one example where I hadn't quite got the interface signals correct until I read this section in more detail. I've now implemented the DAC memory block and have initialised the first 32 entries using data taken from the NCV1 code.

Here's what I have now, with colours more akin to the actual start-up screen (I've hard-coded the border colour to blue for now)...

Simulation using palette RAM look-up

Next up for simulation is the pattern name table (tilemap) RAM block. If I can seed that from an NCV1 memory dump (for example) I should be able to then generate an actual frame from NCV1.

But I don't want to get too far ahead of the state of the MiSTer side of things... might have to reach out for some help on the SDRAM issue. It should be quite simple given I've ripped it all from the Gauntlet core...

UPDATE: now that looks better on MiSTer...


Displaying tile data - half way there.

 A day off work today and I spent it loading the graphics ROM chip.

First task was in the simulator, where the mechanism is very similar to the real hardware but without SDRAM you need to instantiate some dual-port RAM in the simulator top-level Verilog module and code the logic to write the downloaded ROM data into RAM.

To test it I created the missing 'Pattern Plane Generator' sub-module from the YGV608 block diagram and then coded up some simple logic to display the first page of patterns (tiles) from the ROM with a fudged palette. After a few iterations of bug fixes I saw this...

The first page of tiles from the NCV1 graphics ROM

If you zoom in you can make out a shadowed character set, albeit upside-down due to the default orientation of the simulated video display. It does actually match the character set as displayed in MAME, so a good start!

Next step was to replicate this on MiSTer hardware. I borrowed (for now) the SDRAM controller from the Gauntlet project and studied how it multiplexed ROM download and video reads. It's fairly simple and again only a few iterations were required until I got video output again. Unfortunately the output is considerably less interesting than the output from the simulator...

Rather than showing tile data however, the active display area is a solid salmon pink (of all colours!) As a quick test I reflected the requested SDRAM address back as SDRAM data and got the expected cross-hatch pattern - so it's not a connectivity issue between the YGV608 core and the SDRAM. Furthermore (effectively) disabling download displays the same thing, suggesting it's the reads from SDRAM, not the writes to SDRAM that are failing (otherwise there'd be random data or data from the previously loaded Gauntlet core, for example).

So next session I'll continue to debug the SDRAM ROM issue.

Monday 27 November 2023

MiSTer, Verilator and YGV608 video timing block

MiSTer developer JimmyStones has created a framework and a template project around the Verilator simulation tool. To say it's a game-changer is an understatement!

In a nutshell, you wrap your top-level core module in another (System)Verilog module that interfaces to the simulation framework that emulates most of the functionality of the MiSTer framework. Then you run a script to convert your Verilog code to cpp, and subsequently build the MiSTer Verilator project.

That gives you an executable that comprises a UI with simulation controls and video output! Yes - you can see your core's video output almost in real time (if you're not running a trace). And you can also capture a trace of the simulation and load it up into gtkwave to inspect signals. All without touching silicon! The only caveat is that gtkwave freezes quite a bit with large trace files.

As for MiSTer itself, it has a framework that wraps around your core to provide input, ROM download, SDRAM, SD card, video and other functions. This is essentially what the Verilator framework replaces. It provides dipswitch settings, input mapping, video scaling & rotation, video & audio processing and more.

It's been a bit of a ramp-up but quite fun to start working with these tools. After creating a project from JimmyStone's MiSTer template project and then merging in his Verilator template project, I had a NamcoND1 project that simulated showing 'noise' on the video (as it was designed to do) and showed the same on actual MiSTer hardware!

Next step was to start on the NamcoND1 design proper. The obvious starting point was the video timing core for the YGV608. So I created a top-level YGV608 component in Verilog, and a number of sub-components as per the block diagram in the YV608 datasheet. One of those sub-components is the CRT Timing block. Another requisite block was the CPU interface, which contains the on-chip registers for configuration.

I wrote, simulated, debugged and verified the horizontal timing generator in Verilator and gtkwave. To get the timing parameters for Namco Classics I started (again) to RE the ROM (I couldn't successfully load my old RE from a decade-old version of IDAPro). Fortunately one of the very first things it does is configure all the CRT Timing Registers in the YGV608, so I wrote down all the values and hard-coded them into my registers at reset.

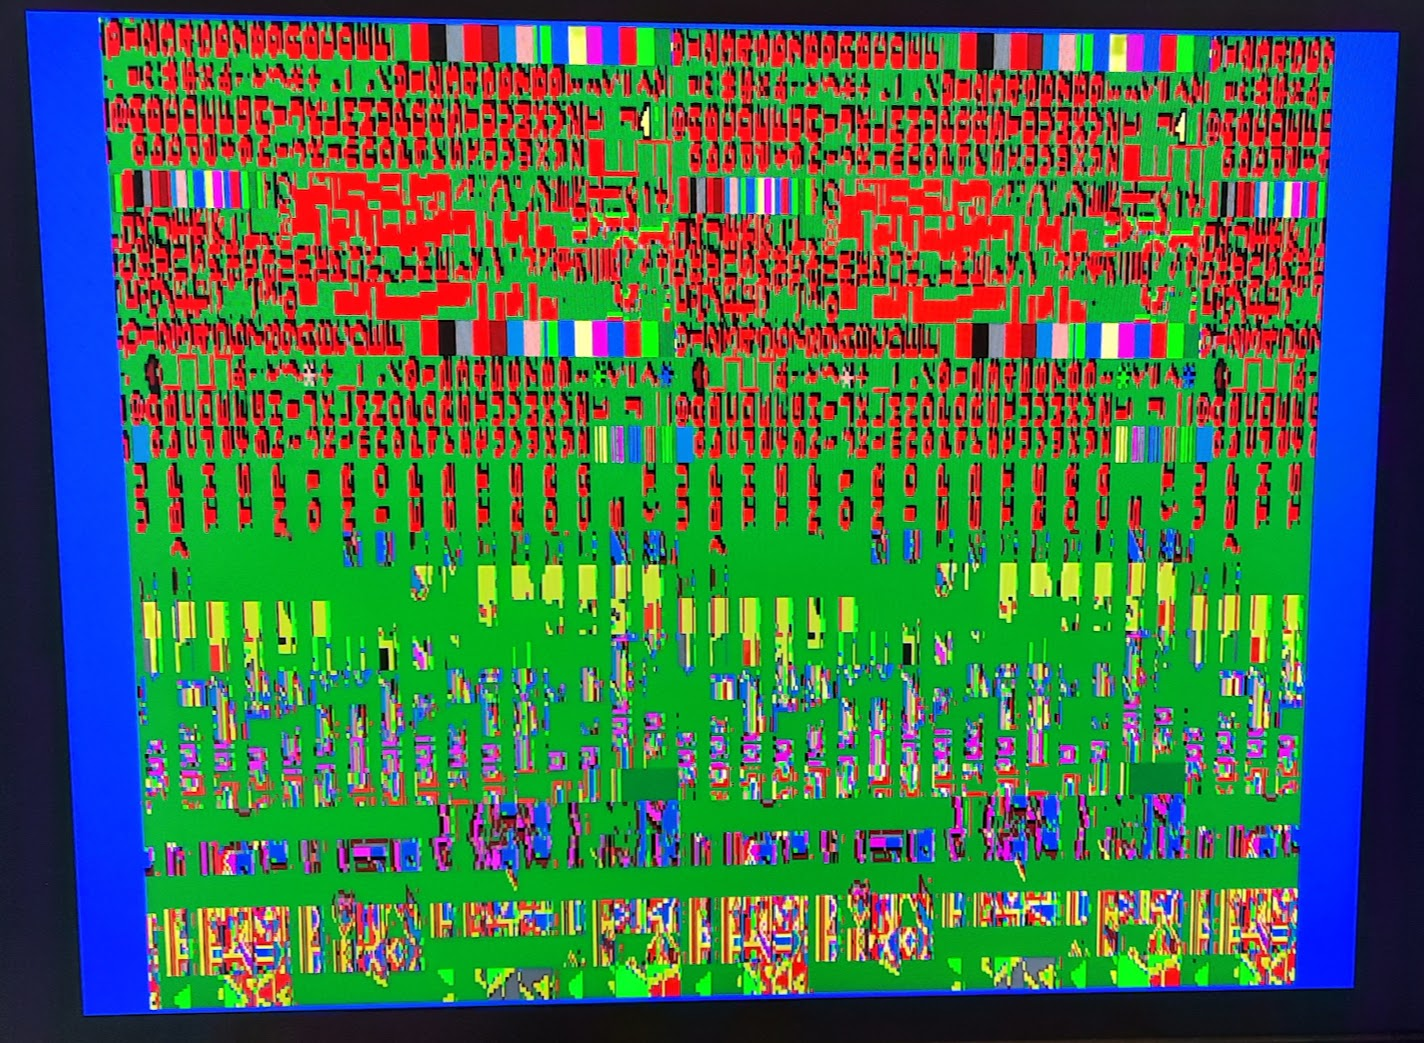
Once that looked OK, I did the same for the vertical timing. When vertical looked OK, I did a quick hack to output the border in RED, and the active display area in GREEN. Here is where I had to make some changes to the Verilator template project to handle YGV608 video output (as opposed to Centipede video output). But it wasn't too long before I saw this...

YGV608 Video Timing output in Verilator

Next step was to build for MiSTer. Because I had changed the top-level of my core, I had to do some minor changes to the wrapper that instantiates my core but otherwise there were no changes required for the MiSTer project, except to change the parameters for the main PLL to output the correct frequency for the YGV608.

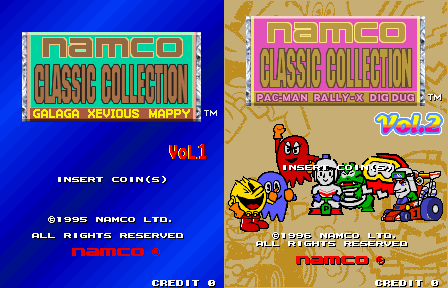
And this is what I saw when I ran it from the MiSTer menu for the very first time...

YGV608 Video Timing output on MiSTer hardware

Yes the borders are different but the Verilator video output is (still) a bit of a hack from my side of things and I haven't yet taken the time to fully understand the video output configuration properly. The point is, I think the MiSTer borders are correct!

So that has been a very successful first exercise in getting something simulated and then running on MiSTer hardware! I'm very impressed with Verilator and JimmyStone's framework. There are some limitations - for example it can't handle SystemVerilog aliases - but the productivity gains are astronomical.

So what's next? I need to load the YGV608 graphics ROMs into the Verilator project. They're loaded into MiSTer SDRAM via the framework, and there's a similar mechanism in the Verilator template project. However there's (currently) no emulation of the SDRAM so you need to instantiate some memory in the top-level Verilog wrapper to store the downloaded data and essentially replace the SDRAM. I've added the ROM file to the Verilator project, and can see it downloading on gtkwave, so now all I need to do (in theory) is instantiate some simple DPRAM for the simulation.

Once that's done I can quickly hack the YGV608 core to simply dump (some of) the ROM contents to the active display area...

Friday 24 November 2023

Resurrection!

After some 7 years I'm back!

I've renamed the blog (and the URL) and given the untimely demise of my NGPACE project, I've revised the topic to comprise all my retro FPGA emulation projects.

After a very long hiatus from homebrew FPGA development, I've decided to put porting on hold for a while and dive back into FPGA emulation. More specifically, development for the MiSTer platform.

There's a pretty big ramp-up to develop for MiSTer, but the simulation tools available now are simply amazing. I'll do a brief intro to both MiSTer and the simulation options in subsequent posts.

I'll leave you with a screenshot of my first project. 


It will be more complex than any FPGA emulation projects I've done in the past, but I've been motivated by recent developments in PSX, Saturn & N64 FPGA emulation which are truly incredible!